Creating custom embroidered patches is an exciting way to personalize your apparel, showcase your brand, or share your designs with the world. Whether you’re looking to adorn your backpack with unique flair or create a unifying symbol for a club or team, embroidery patches offer a durable and professional-looking solution. With advancements in embroidery technology and the accessibility of resources, making custom patches has become an achievable project for enthusiasts at all skill levels.
Embroidery patches begin with a design. Your original concept can be translated into an embroidery file format that an embroidery machine can interpret. The process typically involves choosing the right materials, considering the size and shape of your patch, and understanding the color scheme that will bring your design to life. It also includes a clear understanding of the various types of backing options available for your patch—such as iron-on, sew-on, or Velcro—that determine how your patch will be attached to the fabric.
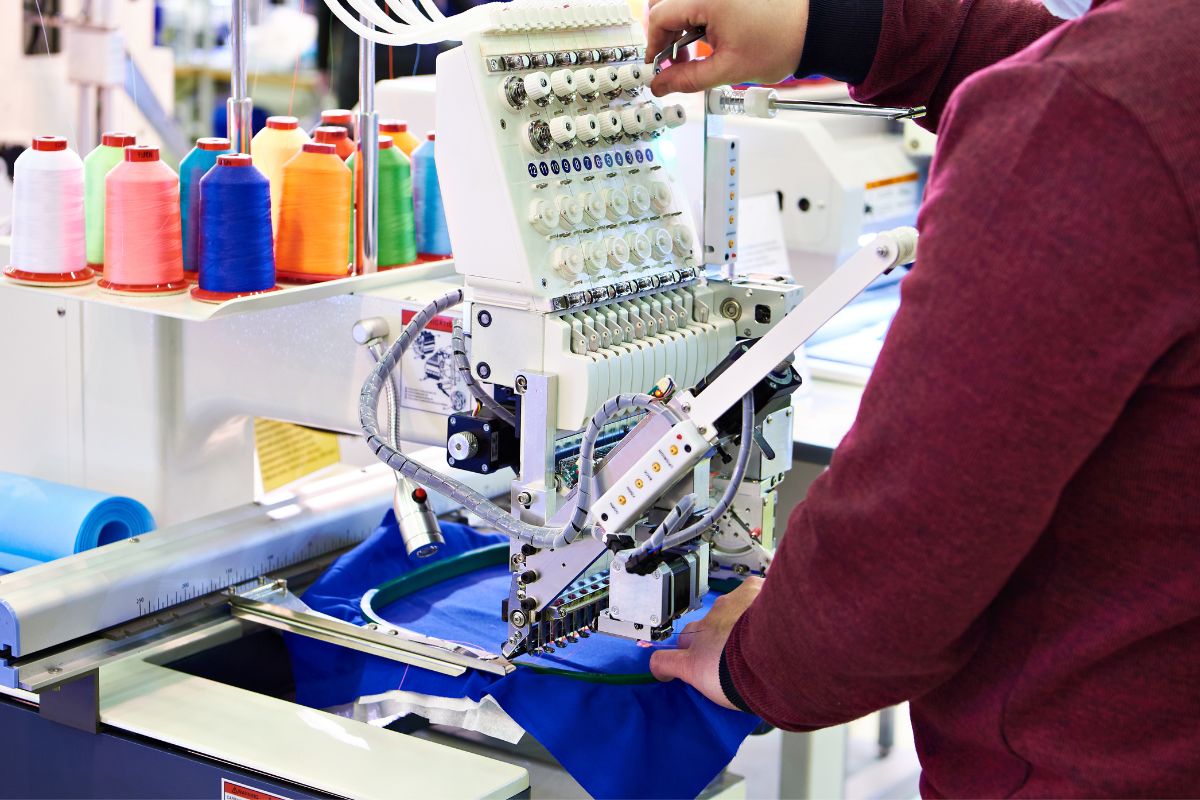
The actual creation of a patch involves a series of steps including stabilizing your fabric, selecting appropriate thread colors, and using an embroidery machine to painstakingly stitch your design. For those starting out, there are numerous online tutorials and guides that provide step-by-step instructions to help bring your vision to fruition. With patience and practice, you can produce custom patches that are both visually impressive and highly personal.
Understanding Embroidered Patches
Embroidered patches are a versatile way to add personality to clothing or commemorate achievements. They can be custom designed, making them ideal for a variety of uses from sports team branding to military insignia.
History and Significance
Embroidered patches have a rich history, rooted in military use to signify rank and distinction. Over time, they’ve become a cultural symbol across various domains, including sports patches for team identity and military patches which embody unit pride and accomplishments. Your custom embroidered patch carries this legacy, serving as more than just a decorative item, but a badge of belonging and recognition.
Types of Embroidered Patches
Embroidered patches come in several types, each with its own advantages:
- Applique Patches: Layers of fabric are stitched onto a base, allowing for textured designs.
- Woven Patches: Finer threads are used for more detailed designs, typically for complex logos or smaller text.
- Custom embroidered patches can also vary based on their attachment method, with iron-on, sew-on, and Velcro being common options for various applications.
When designing your custom patches, consider the rich history they represent and the various types available to best convey your message.
Designing Your Patch
Creating a custom embroidered patch begins with the design process, where your choice of material, the embroidery design itself, and the selection of thread and colors all coalesce to bring your vision to life. It’s essential to consider the durability and appearance of the patch material, the detail and complexity of the design, as well as the visual impact of the thread colors used.
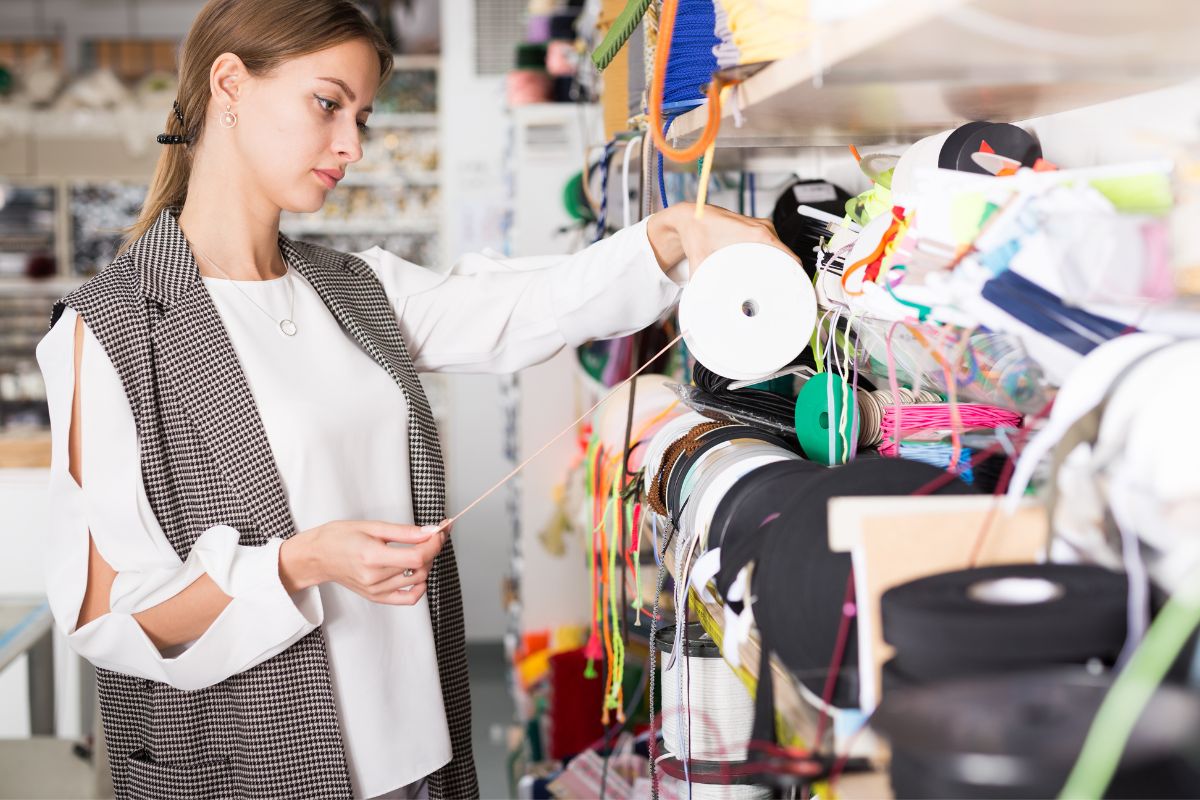
Choosing the Right Patch Material
When selecting your patch material, consider both the aesthetic you aim to achieve and the practicality concerning the item the patch will be applied to. Common materials include:
- Twills: often used as they provide a smooth surface for embroidery.
- Felts: offer a thicker, more textured look, which can enhance the patch’s dimension.
- Canvas: a heavy-duty option that works well for high-wear applications.
Each material varies in how it can affect the overall embroidery coverage, so choose accordingly.
Creating the Embroidery Design
For your embroidery patch design, you’ll typically start with a digital representation, possibly using a logo or other custom artwork. Keep in mind:
- Complexity: More detailed designs may require a finer thread to accurately capture nuances.
- Size: The size of the patch dictates how much detail can be rendered effectively.
Utilize embroidery software to digitize your design, ensuring it’s optimized for the embroidery process.
Selecting Thread and Colors
Thread choice contributes significantly to the visual effectiveness of your custom patch. Consider the following:
- Thread Options: Polyester threads are strong and colorfast, while rayon threads have a lustrous shine.
- Thread Colors: Choose colors that have high contrast with the patch material for the design to stand out.
- Color Fastness: Ensure the thread maintains color integrity through wear and laundering.
Remember, the final appearance of your embroidered patch heavily relies on the interaction of design elements with thread and color selections.
Customization Techniques
When creating custom embroidered patches, mastering customization techniques is crucial. You’ll first digitize your design, then adjust your embroidery machine settings to bring your vision to life.
Digitizing the Design
Before embroidery can begin, you must convert your design into a format that an embroidery machine can interpret. This process is known as digitizing. Start by using digitizing software to trace over your design and set the types of stitches to be used for each section. It’s essential to consider the type of fabric and the size of the patch during this step, as these factors will affect stitch density and pattern.
- Elements to digitize:
- Outlines of the design
- Fills for larger areas
- Details such as small text or intricate patterns
When digitizing, remember to:
- Ensure your design stays within the maximum embroidery area.
- Optimize stitch order to minimize jump stitches and thread changes.
Embroidery Machine Settings
Once your design is digitized, you’ll need to prepare your embroidery machine for the task. Begin by selecting the appropriate hoop size to stabilize your patch material. Then, thread the machine with colors that match your design.
Adjust your embroidery machine settings considering:
- Thread tension: Balanced tension is vital for clear, pucker-free designs.
- Needle type: Use a needle that complements your fabric type—sharper for dense fabrics, ballpoint for knits.
- Stitch speed: Start with a lower speed to ensure precision, then increase as needed based on the complexity of your design and your machine’s capabilities.
Lastly, run a sample on a similar fabric to fine-tune these settings before embroidering your final patch to ensure the highest quality result.
Choosing Patch Attachments

Choosing the right attachment for your custom embroidered patches is essential for ensuring they meet your intended use and application requirements. Each backing option offers distinct advantages depending on the durability needed and the flexibility of application.
Iron-On Backing
Iron-on backing provides a convenient and strong bond. Attach your patch with the following steps:
- Preheat your iron to the hottest setting without steam.
- Place your patch in the desired position on the fabric.
- Press the iron down on top of the patch firmly for 30-40 seconds.
- Iron the opposite side for a complete seal.
Remember that iron-on patches work best on materials that can withstand high heat.
Sew-On Applications
Sew-on patches offer the most secure attachment. Here’s what to consider:
- Sew-on patches require needle and thread or a sewing machine.
- They are ideal for materials that are sensitive to heat or are frequently laundered.
- This method provides the highest durability and permanence.
Sewing directly onto fabric ensures your patch remains affixed, even in harsh conditions.
Alternative Backings
Explore diverse backings for different needs:
- Velcro: Provides versatility for patches that need to be moved or removed often.
- Glue: A quick fix for temporary placement, though less durable.
- Magnet or button loops: These are used when you cannot modify the garment, such as a blazer.
- Consider the fabric and use-case when selecting backing options.
Each alternative backing has its specific use case, ensuring you have flexibility in how you apply your custom patches.
Manufacturing Patches
In this section, you’ll learn the specific steps required to manufacture custom embroidered patches, from base preparation to detailing the final product.
Preparing the Patch Base
Start by selecting a durable base material for your patch; felt is a common choice due to its stability and thickness. Ensure the material is properly hooped in your embroidery machine to avoid shifting during the embroidery process. This will serve as the foundation onto which your design will be embroidered.
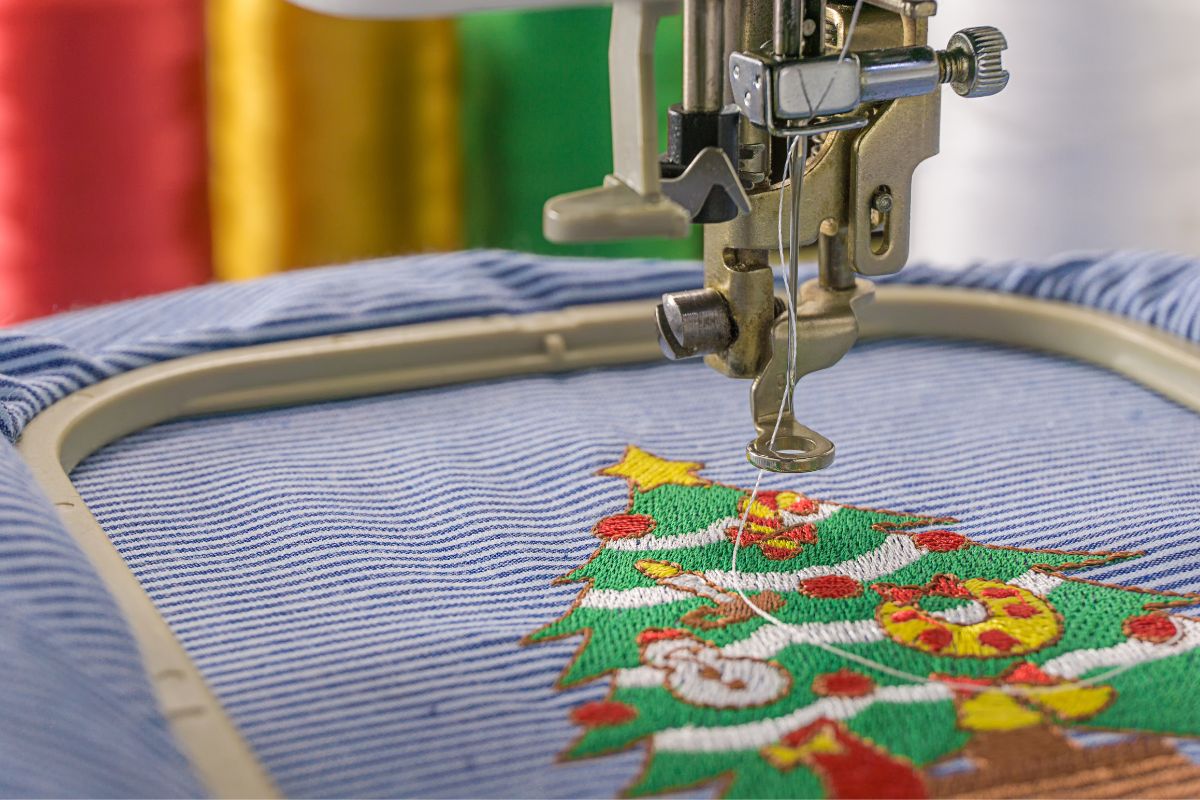
Embroidery Process
Once the base is prepared, you’ll move on to the embroidery. Choose threads according to your design needs; metallic thread can add a unique shimmer if that suits your design. Embroidery machines use digital files to guide the stitching, so ensure your design file is accurate and tested. Pay attention to thread tension and stitch density for a high-quality outcome.
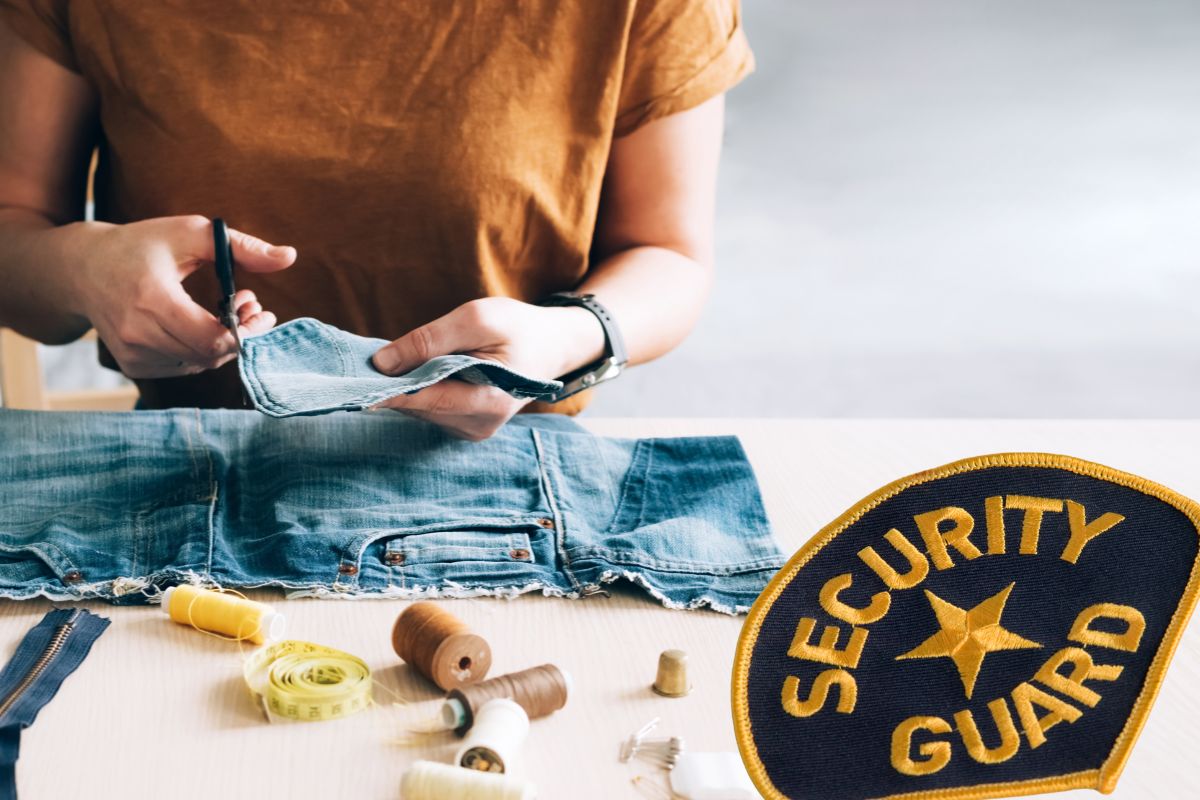
Cutting and Border Finishing
After the embroidery is complete, the patch needs to be cut. Patches can be hand-cut with scissors or machine-cut for uniformity. Once cut, finish the edges to prevent fraying. A merrow border creates a raised edge around the patch, providing a classic look and additional durability. Alternatively, you may opt for a patch border or choose to have no border if you prefer a seamlessly integrated patch when applied to the garment.
Remember, your choice of materials and attention to detail during each stage will determine the overall quality of your custom patches.
Application and Care
Before you attach your custom patch or begin its maintenance, ensure you have the right tools and knowledge to preserve the integrity of the embroidery and extend its lifespan.
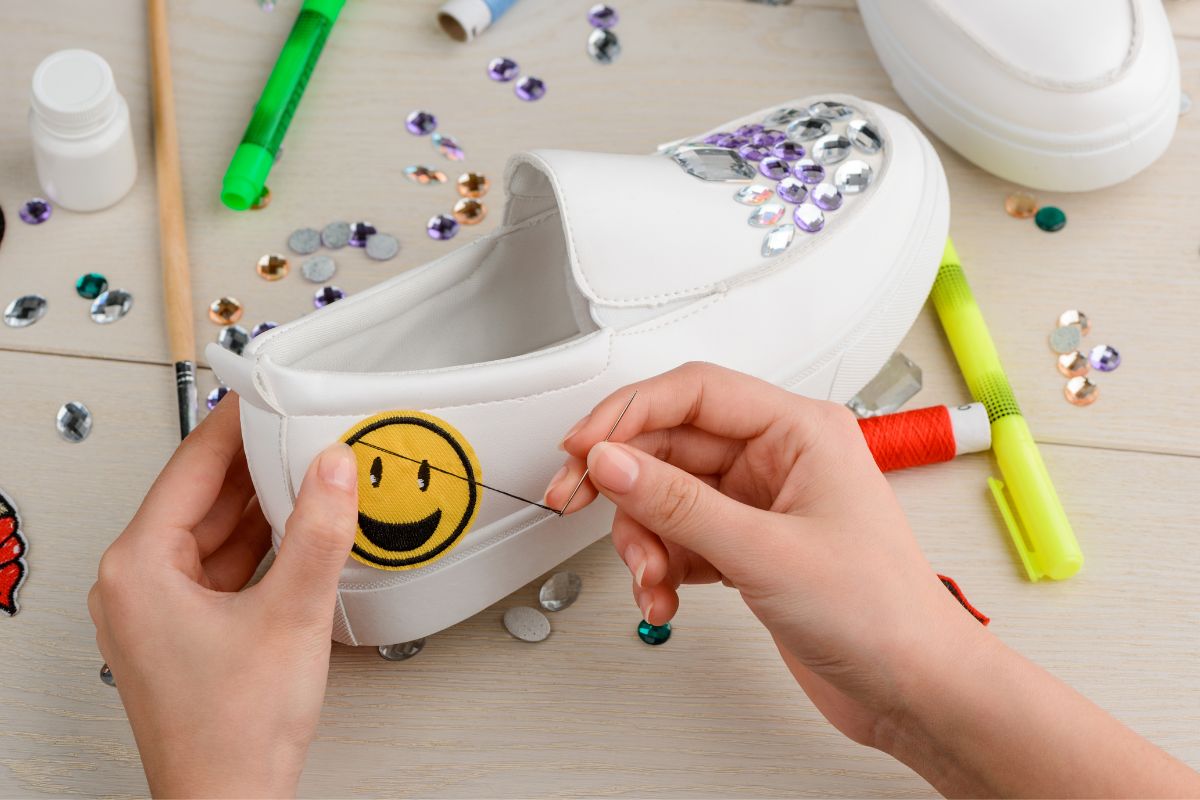
Attaching Patches to Fabric
Materials Needed:
- Embroidery patch
- Fabric (clothes, jackets, hats, etc)
- Iron and ironing board (for iron-on patches)
- Sewing needle or machine
- Thread (color-matched to the border)
- Stabilizer (for heavy-duty applications)
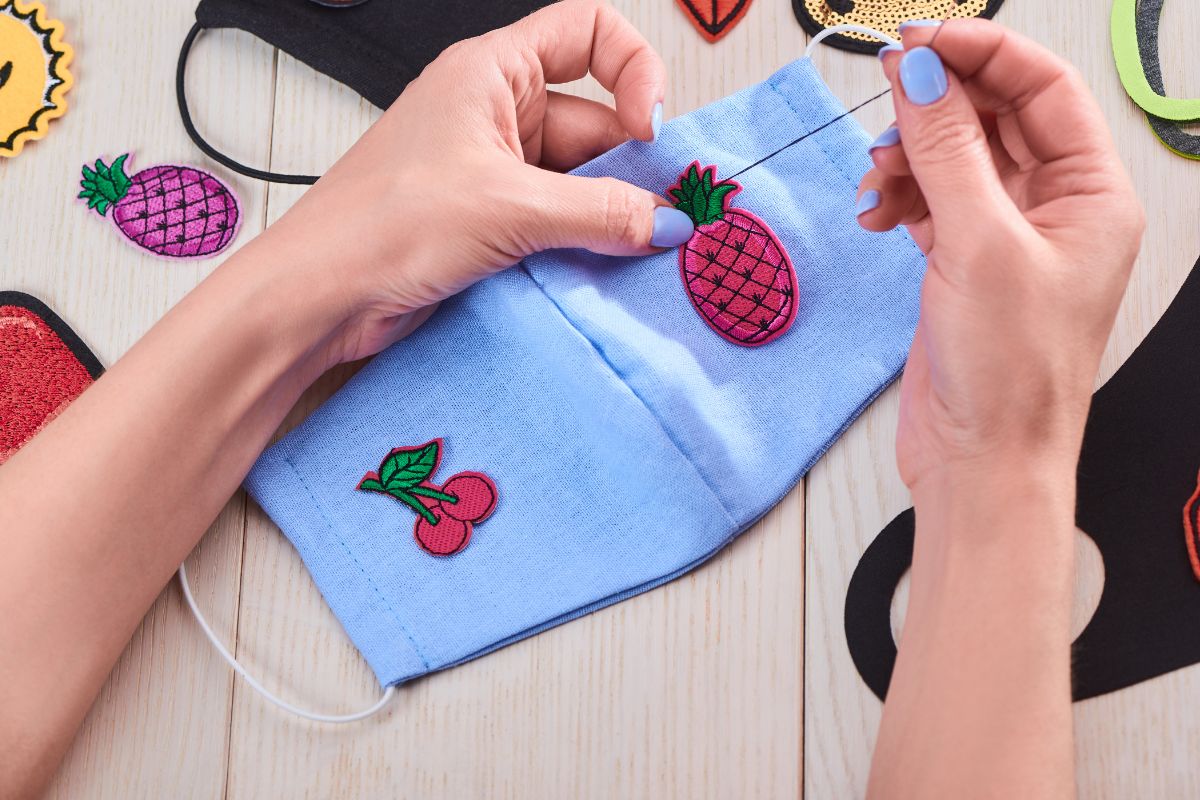
For Sew-on Patches:
- Position your patch on the fabric in the desired location.
- If using a stabilizer, place it behind the fabric for extra support.
- Secure the patch with pins or a temporary adhesive.
- Sew around the edges with a tight zigzag or satin stitch.
For Iron-on Patches:
- Preheat your iron to the required temperature (do not use steam).
- Place the patch on the fabric and cover it with a thin cloth or parchment paper.
- Press the iron down firmly over the patch for 30-40 seconds without moving it.
- Turn the fabric inside out and iron the back of the patch for another 30 seconds.
Maintenance Tips
Cleaning:
- Machine-wash your garment on a gentle cycle with cold water.
- For hand-washing, use a mild detergent and gently scrub the patch surface.
- Do not bleach or use fabric softeners as they can damage the embroidery.
Storage:
- Store your embroidered items in a cool, dry place away from direct sunlight.
- If folding, avoid creasing the patch to prevent damage.
Repairs:
- If threads become loose, carefully trim them or secure them with a small amount of fabric glue.
- For a detached patch, reattach it by following the original application method.
Ordering and Pricing
When you decide to order custom embroidered patches, understanding the pricing structure and order minimums is crucial for an effective purchase.
Understanding Order Minimums
Order minimums are the least number of patches you can purchase in one order. Custom patch providers often have a set minimum order quantity to ensure the production is cost-effective. For instance, some companies may have minimums as low as 10 patches, while others might require a larger number, like 200 patches to start the manufacturing process. It’s important to note that ordering in bulk frequently reduces the per-patch cost, making larger orders more affordable per unit.
Estimating Costs
The cost of your custom patches will depend on several specific factors, including:
- Size of the patches: Larger patches require more materials and are more expensive.
- Design complexity: Intricate designs take more time to produce and may increase the price.
- Embroidery coverage: This is how much of the patch’s surface is covered by embroidery. Common coverage options are 50%, 75%, and 100%, with the latter being the most expensive.
- Quantity ordered: Buying more patches usually results in a lower cost per patch due to bulk pricing.
To estimate your costs, you should first determine the specifications of your patch order, including the desired size, design complexity, and embroidery coverage. Then, consider the quantity you require within the context of order minimums. Once you have this information, you can typically get a more accurate pricing estimate, which may start as low as $0.50 per patch for basic designs in larger quantities. Keep in mind that additions such as special options or add-ons will affect the final price of your order.
Benefits of Custom Patches
Custom patches serve as a potent blend of personal expression and professional branding. They can effectively communicate your identity and values to a broader audience, enhancing both team spirit and brand awareness.
Personal and Professional Use
Your custom patches reflect individual personality and style, making them a perfect conduit for self-expression. Whether for your school uniform, bag, or jacket, patches add a unique touch that sets you apart. Professionally, they are a marker of identity, uniting members of an organization or team and fostering a sense of camaraderie.
- Team Spirit: Patches can symbolize team unity and pride.
- Personality: Each patch can be a canvas for personal storytelling.
Marketing and Branding
In marketing, custom patches can act as miniature billboards, circulating your brand far and wide. This cost-effective tool enhances brand recognition and serves as a tactile marketing asset. They’re versatile enough to be attached to various products or apparel, expanding your brand’s reach.
- Brand Awareness: Patches contribute to visibility in public spaces, events, and gatherings.
- Versatile: Patches can be applied across a broad range of items, from clothing to accessories.
Patch Accessories and Enhancements
Selecting high-quality accessories and enhancements for your custom embroidered patches can significantly elevate their appearance and durability. The materials and backings you choose are foundational to creating a patch that not only looks professional but can also withstand the wear and tear of daily use.
Premium Materials
For the thread, opting for premium options is essential to the vibrancy and longevity of your patch. Madeira and Gunold are top choices that offer a wide range of colors and are known for their durability and fade resistance.
- Rayon: A popular choice for its brilliant sheen, smooth finish, and robust color selection.
- Polyester: Highly durable, colorfast, and bleach-resistant — excellent for work uniforms or outdoor gear.
In the USA, these threads meet high-quality standards and comprehensive color choices that empower you to bring your designs to life with precision.
Specialty Backings
Your patch’s backing contributes to its function and application. Various options serve different purposes:
- Iron-on: A heat-activated adhesive backing. Ideal for ease of application.
- Velcro: Provides the flexibility to remove or interchange patches.
- Adhesive: For temporary applications; a quick fix for events.
- Plastic: Adds stiffness and supports the patch’s structure for sewing onto garments.
Choose a backing that aligns with the intended use and convenience for your custom patch project.
Frequently Asked Questions
Embroidered patches are a popular way to add a personal touch to apparel, with a process that can be both creative and technical. These FAQs address common questions about making custom embroidered patches.
What materials are needed to create a handcrafted embroidered patch?
To make a handcrafted embroidered patch, you’ll need a piece of twill fabric as the base, embroidery floss or threads in various colors, a needle, stabilizer, and an adhesive or iron-on backing material. Additionally, scissors and an embroidery hoop can aid in the process.
What is the process for creating patches using an embroidery machine?
When using an embroidery machine, you start by digitizing your design to create a file compatible with the machine. Select the twill fabric and secure it in an embroidery hoop with a stabilizer. The machine then uses the digitized file to accurately stitch the design onto the fabric. Once complete, trim the patch to size.
How can one turn a custom patch business into a profitable venture?
To make a custom patch business profitable, focus on unique designs, quality craftsmanship, and efficient production techniques. Market your patches effectively to target audiences, establish a strong online presence, price competitively, and provide excellent customer service.
What techniques are used to make an iron-on embroidered patch?
An iron-on embroidered patch is made by first stitching the design onto fabric, then applying an iron-on adhesive to the back. Upon completion of the embroidery, cut out the patch shape, and attach the adhesive backing according to manufacturer instructions, usually involving heat application.
What steps are involved in transforming a personal image into a patch?
To transform a personal image into a patch, begin by converting your image into an embroidery file format, a process known as digitizing. Once digitized, select your materials and use an embroidery machine or hand-stitching techniques to replicate the image onto fabric. Finish by affixing the appropriate backing.
How can you create embroidered patches if you do not have access to a machine?
Without a machine, you can create embroidered patches by hand-stitching the design with a needle and thread using techniques like the satin stitch, backstitch, or blanket stitch. After embroidering the design, cut the patch to shape and apply a hand-sewn or adhesive backing.