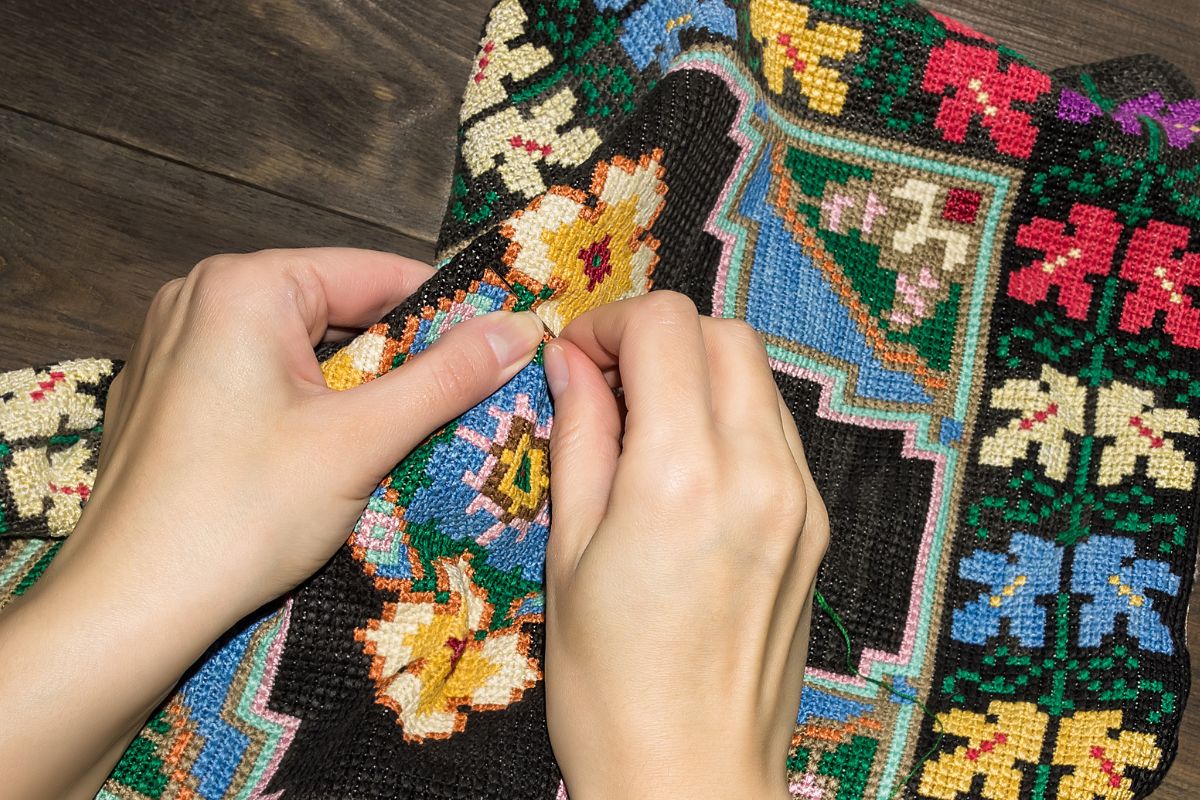
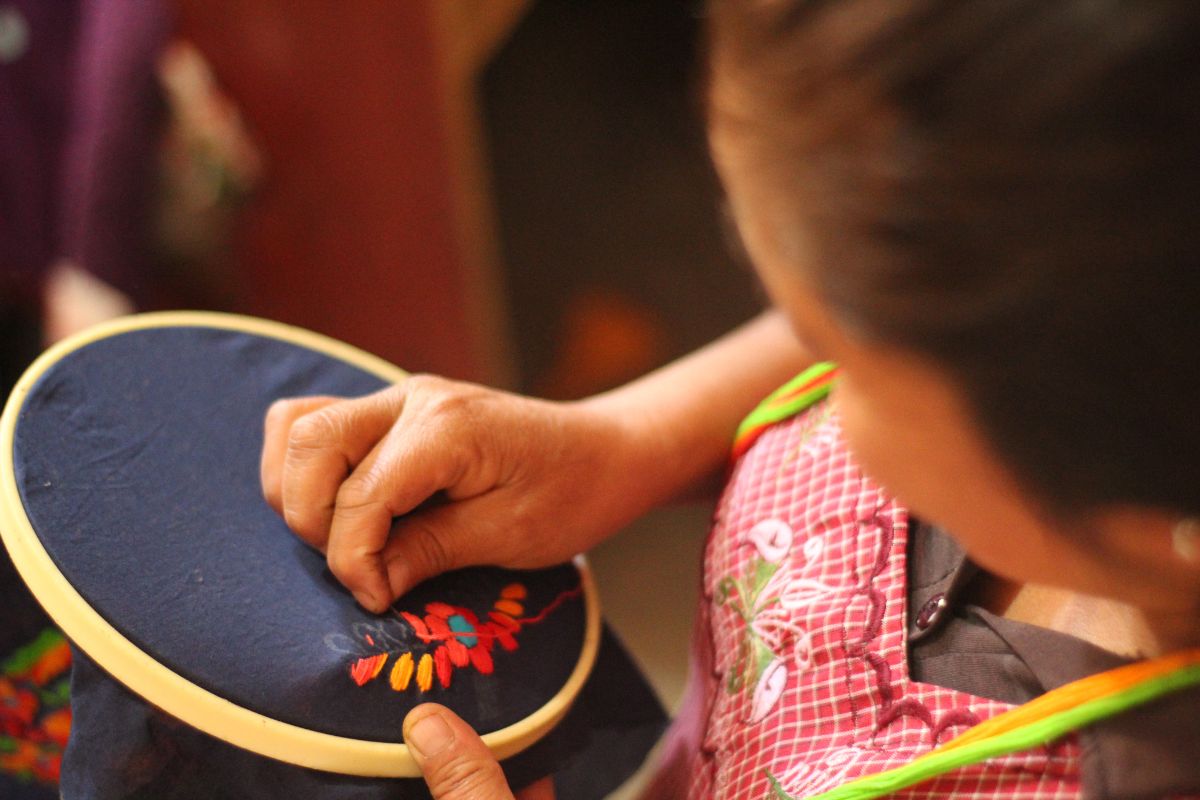
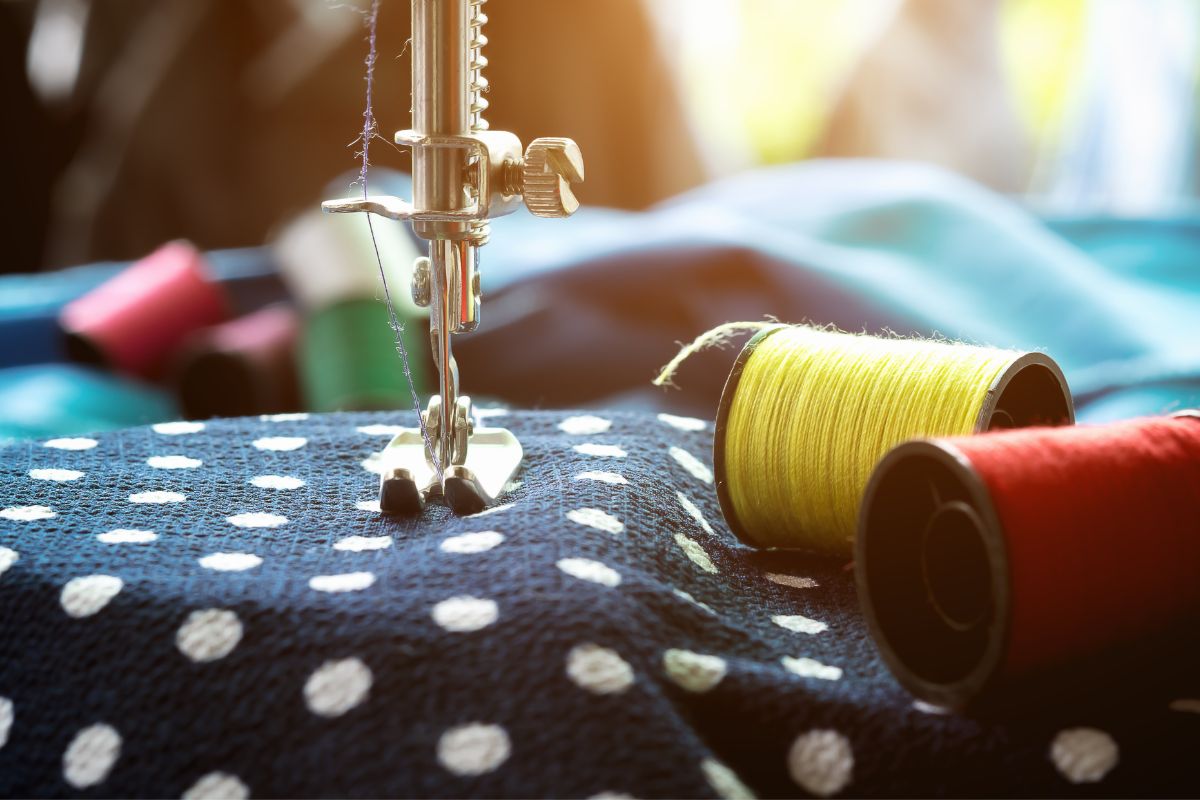
Embroidery, at its core, is the art of decorating fabric using a needle and thread. My experience with the craft has shown me that it offers a diverse range of possibilities in both design and technique. The process involves bringing a design to life on textiles, whether it’s clothing, home decor, or art pieces. I’m always fascinated by how a piece of thread can transform plain cloth into a tapestry of patterns and colors.
I achieve embroidery by carefully stitching threads onto a piece of fabric in specific patterns that form a design. The process can be done by hand, which allows for intricate and personalized details, or by using a machine, which is more suitable for producing consistent results at a higher speed. Regardless of the method, the texture of the embroidery adds a unique dimension to the text on the fabric that can’t be replicated by other decoration methods.
Understanding the basics involves getting to grips with various stitches and techniques. Mastery comes with practice, as the tension of the thread, uniformity of the stitches, and the fluidity of the design are pivotal for the finished product to look professional. I keep a close eye on the consistency of my stitches and the overall development of the design I’m working on, ensuring each embroidered piece is as engaging as it is durable.
History and Evolution of Embroidery
Embroidery’s history showcases the blend of artistry and innovation over millennia. From ancient hand-stitched patterns to modern machine-generated designs, the craft has evolved, reflecting cultural and technological milestones.
Ancient Beginnings
The earliest evidence of embroidery dates back to around 30,000 BC, with finds suggesting fossilized decorative clothing. However, my understanding identifies that in ancient China, during the Warring States period (5th-3rd century BC), embroidery began to flourish, with silk thread, beads, and precious stones becoming common materials. Not to be overlooked, ancient Egypt also played a pivotal role, with techniques like the chain stitch and satin stitch being utilized as early as the production of the garments found in the tomb of Tutankhamun in 1922.
Medieval Embroidery
Moving into medieval times, Europe embraced embroidery as both a form of aristocratic expression and devotional practice. Notably, the Bayeux Tapestry, a detailed embroidered cloth depicting the Norman Conquest of England in 1066, exemplifies the advanced skills of embroiderers from this period. The Mughal period in India saw the rise of intricate hand embroidery on saris and other garments, often with gold and silver threads, emphasizing its significance in fashion and status.
Industrial Revolution and Beyond
The Industrial Revolution marked a major turning point for embroidery with the advent of machine embroidery in the latter half of the 19th century. This leap originated in St. Gallen, eastern Switzerland, and introduced the mass production of embroidered goods. Eventually, Japan also embraced machine embroidery, innovating the craft further with technology advanced enough to add intricate logos and monograms to apparel on a large scale. This technological advancement irrevocably widened the accessibility and application of embroidery in everyday textiles.
Types of Embroidery
Embroidery is a diverse craft that encompasses a variety of techniques, each with its own aesthetic and methods. From intricate hand stitches to advanced machine patterns, embroidery offers a vast scope for creativity and application.
Hand Embroidery Genres
Free Embroidery:
In my experience with free embroidery, the stitches don’t rely on the fabric’s weave to construct patterns. This allows me a lot of freedom to stitch complex designs with a fluid and expressive finish. Common genres within this style include:
- Blackwork Embroidery: Known for its geometric or floral patterns, I use black thread primarily; however, other colors can also be added for modern variations.
- Whitework: This technique emphasizes texture and shadow by using white thread on white fabric; it’s a style that requires precision and attention to subtle detail.
- Goldwork: Involves stitching with metal threads, which I find both opulent and demanding, as it’s a method traditionally used for ceremonial and high-status items.
- Crewel Work: Utilizing woolen yarns on linen fabric, this technique that I explore brings a dimensional and textured feel to the embroidery due to the nature of the yarn.
- Needlepoint: Also known as canvas work, where I stitch on a rigid fabric or mesh, allowing for durable and detailed creations with a multitude of thread types.
Machine Embroidery Types
Flat Embroidery:
In machine embroidery, the styles and possibilities have expanded with technology. Here are a few types that I’ve worked with:
- Standard Flat Embroidery: The most common type where I’ve produced designs on flat material without additional texture or dimension.
- 3D Puff Embroidery: By adding a foam underlay to the fabric before stitching, I’ve seen it create a raised effect, giving the design a three-dimensional look.
- Appliqué: Using a combination of fabrics and stitching, I’ve created layered pieces, adding depth and interest to the piece.
- Cutwork: Similar to this is cutwork, a process in which parts of the fabric are cut away and the edges reinforced with stitching; machine embroidery lends itself well to producing these large numbers with precision.
By exploring these varied types of embroidery, I have better appreciated each technique’s history, intricacies, and the impact of modern technology on traditional crafts.
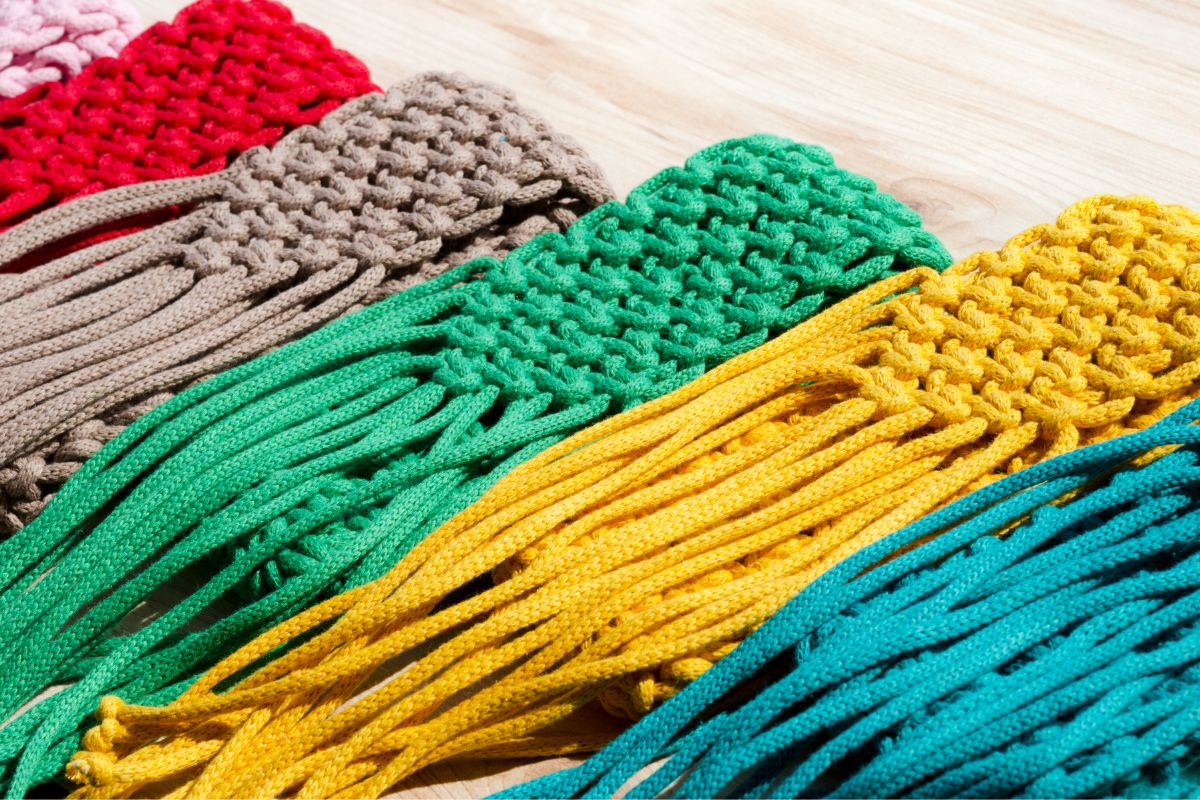
Materials and Tools
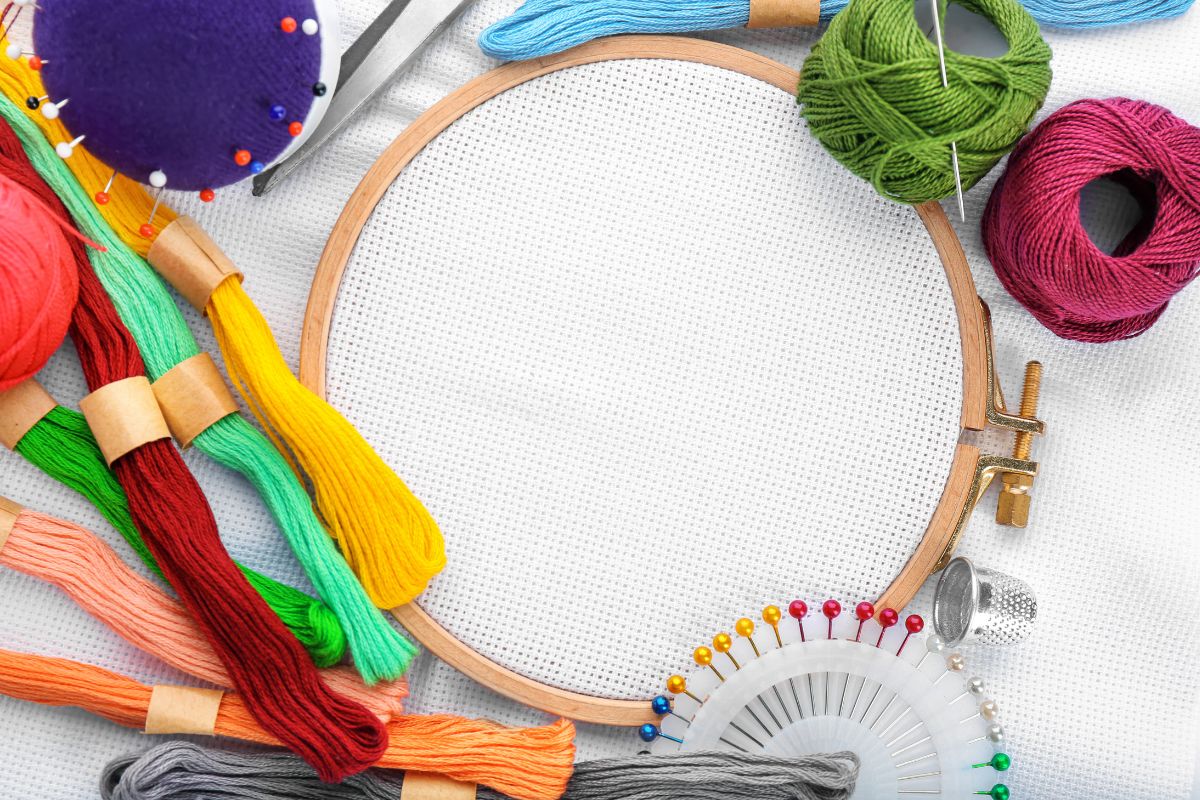
In this section, I’ll guide you through the essential materials and tools needed for embroidery. From selecting the right fabric to choosing the best thread, these components play a crucial role in the craft.
Fabrics
For my embroidery projects, I typically choose fabrics based on the technique and the end use of the embroidered piece. Popular options include:
- Linen: Durable with a natural look, it’s ideal for heirloom quality work.
- Cotton: Versatile and comes in various weights, from light muslin to heavy canvas.
- Silk: Luxurious and smooth, it allows for intricate details.
- Polyester: Cost-effective and colorfast, great for items that require frequent washing.
Threads
The thread is the lifeblood of embroidery, adding color and texture:
- Embroidery Floss: Versatile and comes in cotton, silk, and rayon, often split into strands.
- Silk Thread: Gives a natural sheen, enhancing the design’s luxurious feel.
- Metallic Thread: Includes gold, silver, and other metallics, adding sparkle to the piece.
- Bobbin Thread: Lightweight and usually used in machine embroidery underneath the fabric.
Needles
Choosing the right needle is essential:
- Embroidery Needles (Crewel): Have a sharp point and a long eye, facilitating easy threading of embroidery floss.
- Tapestry Needles: These have a blunt point and are used for needlepoint and counted thread work.
- Milliner Needles: Feature a consistent thickness and are perfect for French knots and bullion stitches.
Hoops and Frames
A good embroidery hoop or frame ensures fabric tension:
- Embroidery Hoop: Typically made of wood or plastic, it comes in various sizes and keeps the fabric taut while stitching.
- Embroidery Frame: Allows for larger and more complex projects, especially when engaging in a freestyle technique.
Additional Accessories
Lastly, these extra tools enhance the embroidery process:
- Embroidery Scissors: Small with fine points, these scissors are perfect for snipping thread and trimming fabric.
- Lace Tools: Bobbins and pins may be used to create intricate lace patterns, which can be incorporated into embroidery for added texture and design.
By understanding and selecting the appropriate materials and tools, I ensure that my embroidery projects are not only enjoyable to work on but also result in beautiful, high-quality creations.
Embroidery Techniques
In my experience with embroidery, mastering the various stitches and understanding different decorative and finishing techniques are crucial for creating high-quality work. I will guide you through the essential embroidery methodologies.
Stitch Varieties
In the realm of embroidery, a diverse array of stitches allows for a great deal of creativity and texture in designs. The following are notable stitches I often use:
- Satin Stitch: I employ the satin stitch to fill large areas with smooth stitches that lie flat, creating a silky texture.
- Chain Stitch: This stitch resembles a chain link and is perfect for outlining or adding decorative elements.
- Running Stitch: A basic stitch I use for outlining, where the needle weaves in and out of the fabric.
- Cross Stitch: By crossing two stitches over one another, this stitch forms an ‘X’ and is popular in counted thread embroidery.
- Backstitch: For defined lines and outlines, I turn to the backstitch, which creates a solid line.
- French Knots: Small, tight knots that I use for accents like flower centers or textured points.
- Split Stitch: A versatile stitch where one stitch splits the previous one; it’s great for lines and curves.
- Stem Stitch: Ideal for creating plant stems and curving lines due to its twisted, rope-like appearance.
- Couching: This is where I lay a thread across the fabric and use smaller stitches to anchor it in place.
- Blanket Stitch: A neat method I use for finishing edges or as a decorative edge stitch.
Decorative Techniques
For adding flair and artistry to my projects, I utilize various decorative techniques:
- I incorporate 3D elements like stumpwork, where elements are stitched separately and then attached to the main fabric to create dimension.
- Beadwork and sequins are often used for extra embellishment and sparkle.
- I apply layering different stitch types to add depth and perspective to my designs.
Finishing Methods
Ensuring a project is as beautiful on the back as it is on the front, I practice several finishing methods:
- Securing thread ends is a must, so I weave them in with a needle or use a knot, depending on the fabric and design.
- I cut excess fabric and use a fray check solution to prevent fraying edges.
- If a hoop was used, I finish by gently pressing the fabric to remove any hoop marks and to ensure that the stitches lay flat.
Embroidery Applications
Embroidery can transform ordinary textiles into uniquely embellished items. I focus on the intricacies of decorating apparel, enhancing home decor, and personalizing accessories to elevate their aesthetic appeal.
Clothing
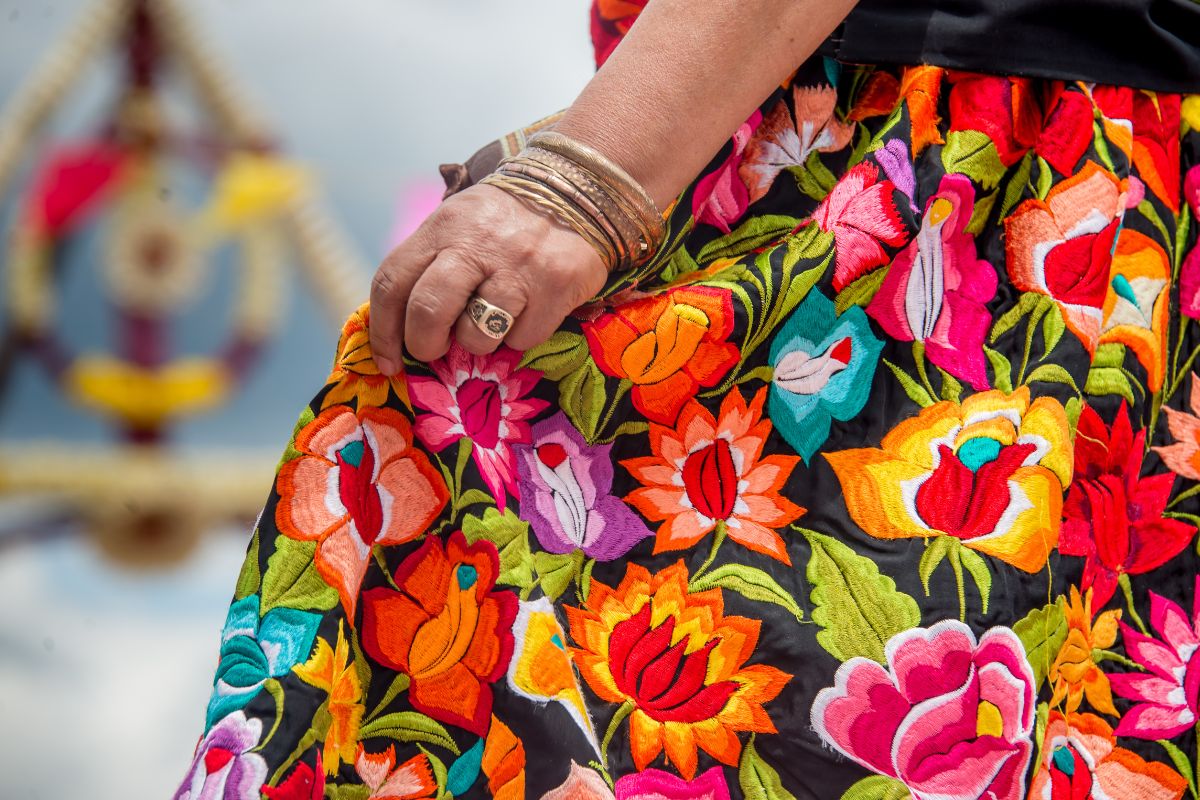
In my experience, embroidery offers a versatile avenue to adorn various clothing items, adding texture and color. It’s particularly effective for:
- Dresses and Coats: I’ve seen embroidery employed to add elegance through intricate patterns, often with the addition of beads or sequins for a touch of luxury.
- Shoes: In shoes, I’ve observed embroidery serve as an artistic touch, making a standard pair one-of-a-kind.
- Hats and Apparel: Small, detailed stitching can turn hats and general apparel into statement pieces with personality.
Home Decor
Embroidery in home decor is not just about aesthetics but also implies comfort and hospitality. Here is how I’ve seen its application:
- Quilting: Embroidery has been integral in quilting, offering a dimension of depth and storytelling through fabric.
- Towels: Personalized towels with monogramming or thematic designs are common applications, enhancing the visual interest of bathroom and kitchen spaces.
Accessories
Accessories are prime candidates for custom embroidery, where I’ve noted the following practices:
- Bags: Whether it’s a tote or a sophisticated clutch, adding embroidered elements can elevate a bag from simple to sophisticated.
- Scarves: A simple scarf can be transformed with embroidered accents, sometimes using pearls or small beads for a refined look.
Embroidery in Fashion and Society
Embroidery’s intricacy and the labor-intensity of its craft have made it a historical symbol of wealth and status, while its recurring trends underscore its enduring impact on fashion.
Symbol of Status
I’ve observed that historically, the use of silk and the elaborate technique called opus anglicanum (English work) were particularly sought after for their richness and refined appearance. These prestigious embroidery styles often adorned the clothing of the wealthy and nobility, serving as a clear indicator of their high social ranking. These garments were not merely clothes but symbols, meticulously handcrafted using luxurious threads on costly fabrics like silk to exemplify their status.
Fashion and Trends
Embroidered clothing, especially in the realm of fashion, tends to evolve with style trends while also reinforcing certain classics. For instance, the satin stitch, a fundamental yet versatile technique, consistently appears in contemporary designs. Fashion and trends rely on the textural and visual depth that embroidery adds, creating unique patterns that can transform a simple garment into a statement piece. The dynamic nature of embroidered fashion also keeps it at the forefront of both haute couture and street style, ensuring its continued relevance and appeal.
Modern Embroidery
Modern embroidery blends traditional techniques with contemporary designs, giving me the chance to create both simple and intricate works of art. My embroidery journey can start with DIY projects or be fine-tuned through professional workshops and studios.
DIY Embroidery
When I begin with DIY embroidery, I typically start by learning the basics. Embroidery 101 for me means understanding various stitches, selecting appropriate fabric and thread, and practicing my technique. I can easily find numerous embroidery tutorials online that guide me through different patterns and projects.
- Materials Needed:
- Embroidery hoop
- Fabric (linen or cotton blends work well)
- Embroidery floss
- Needles
- Scissors
- Basic Stitches to Learn:
- Running stitch
- Back stitch
- Split stitch
- Satin stitch
- French knots
One essential step in my DIY embroidery journey is transferring my desired design onto the fabric. This can be done using a variety of methods such as tracing, using transfer paper, or printing directly onto stabilizer paper.
Professional Workshops and Studios
As my skills progress, I might decide to join professional workshops or studios to refine my abilities. These workshops are often organized by embroidery guilds or local studios and provide advanced training, usually by seasoned embroiderers. Here’s what I can expect:
- Structured curriculum that builds on my existing skills
- Learning new techniques like goldwork or silk shading
- Access to high-quality materials and tools
- Networking with other embroidery enthusiasts
Professional workshops and studios offer an immersive experience, giving me comprehensive guidance to tackle more complex designs and methods. Such settings also provide me with a community of like-minded individuals, helping me stay motivated and inspired.
Learning Embroidery Basics

Embroidery transforms simple fabrics into intricate art through needlework. It requires mastery of materials and techniques which I will explore in this section.
Getting Started
To begin my embroidery journey, I first ensure that I have the necessary tools. This includes a selection of needles, appropriate for various thread weights, and an embroidery hoop to keep the fabric taut. I select a stabilizer according to the fabric type to prevent puckering and use a water soluble marker for precise design transfer.
Here’s a basic list of materials needed to start embroidering:
- Embroidery needles: Various sizes for different thread weights
- Embroidery hoop: Keeps fabric stretched and stationary
- Threads: A variety of colors for creating designs
- Stabilizer: Provides fabric support
- Fabric: Good quality, suitable for embroidery
- Water soluble marker: For transferring designs onto fabric
Before starting, I choose a simple design, perhaps involving basic flowers, to create my initial sample. This allows me to practice fundamental stitches such as the running stitch, back stitch, and satin stitch.
Advanced Techniques
Once I’m familiar with the basics, I progress to advanced techniques that add depth and complexity to my art needlework. I incorporate various stitches, like the French knot and the lazy daisy, to add texture and dimension to my designs.
To refine my craft, I experiment with:
- Layering: Combining different stitches for intricate designs
- Blending: Using gradient colors for a more detailed effect
- 3D Embroidery: Applying beads, sequins, and other materials for a raised texture
It’s essential that I constantly practice and challenge myself with new patterns and stitch combinations to progress in my embroidery skills.
Embroidery as an Art Form
Embroidery goes beyond mere embellishment; I see it as a sophisticated and transformative medium in the world of decorative arts. It’s a practice where needlework and design interface, breathing life into textile with each deliberate stitch. The traditional cross-stitch, a simple X-shaped stitch that lays the foundation of many embroidery designs, exemplifies how methodical approaches to needlework can coalesce into captivating visuals.
In my work, emphasis is placed not only on the final design but also on the textural depth unique to embroidery. By layering threads and varying stitching techniques, the resulting compositions possess an almost sculptural quality. The designs I create reflect an intricate dance of colors and shapes, infusing both classical motifs and contemporary narratives with equal finesse.
Embroidery, as an art form, has vastly evolved. Once relegated as ‘women’s work’, today it demolishes boundaries, allowing artists to meditate through patterns and contribute to a vibrant decorative art landscape. As an artist, I distill inspiration from a wide array of sources, meticulously translating these into tactile experiences. Juxtaposing different threads and materials, I explore the multifaceted nature of embroidery, continually pushing the medium beyond its traditional confines.
Key Techniques I Use:
- Laying: Smooth, flat stitches for a neat finish.
- Stippling: Tiny, close-together stitches to fill a space.
- Appliqué: Adding other materials for a 3D texture.
Through my needle and thread, stories are woven, and visions articulated. The process, both meditative and immersive, allows for an intimate connection with my art, inviting viewers to explore the layered complexities within each piece.
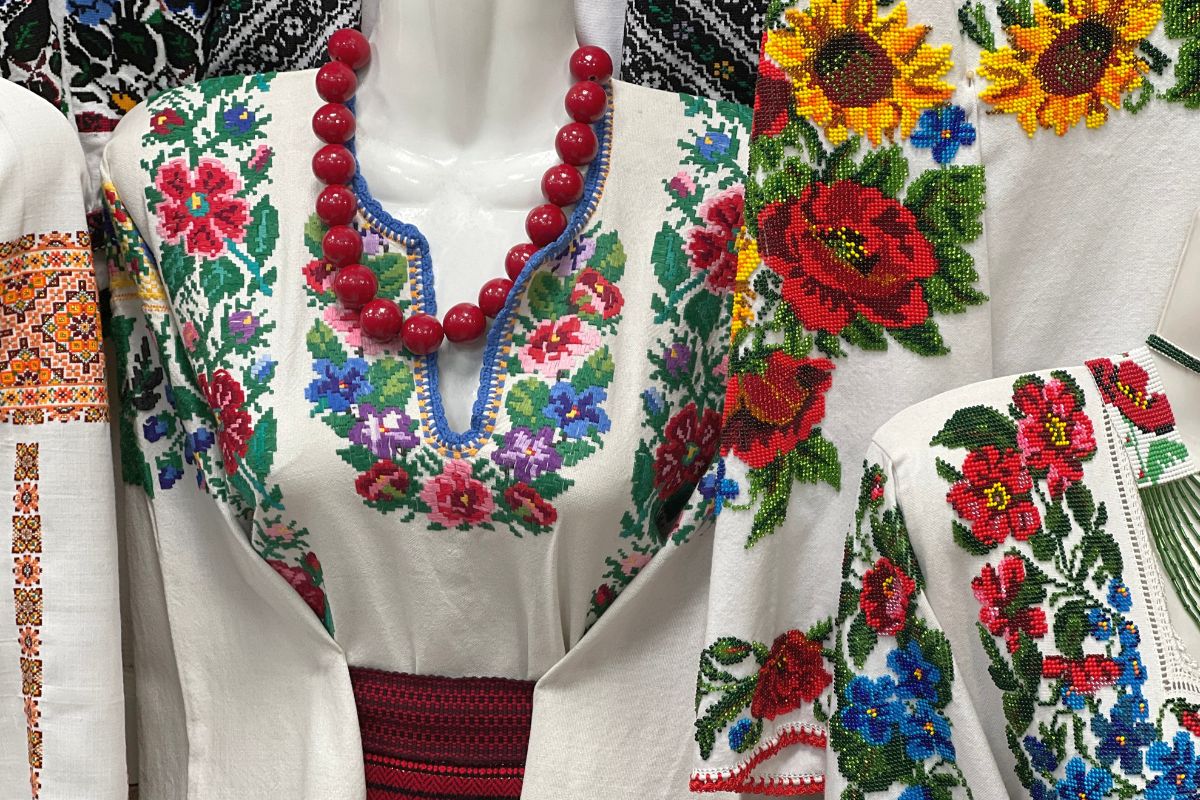
Cultural Significance of Embroidery
Embroidery’s contribution to cultural identity and storytelling is monumental, and I find that particular styles and methods have become inseparable from the traditions they represent.
Embroidery in Different Cultures
Ancient Egypt: I take note of the embroidery techniques seen in Egyptian tomb paintings, which serve as a testament to their sophistication during that era. Notably, the chain stitch and satin stitch were prevalent, and these have been preserved through time, telling stories of the era’s aesthetics and skills.
China and Japan: In East Asia, embroidery is an integral aspect of cultural expression. The Chinese tradition, especially during the Warring States period, has influenced today’s intricate silk embroideries. Meanwhile, in Japan, I recognize that the craftsmanship during the Nara period has left a lasting imprint with techniques such as kogin-zashi, sashiko, and the decorative kimonos that carry both artistic value and historical narratives.
Mughal Period: The Mughal period in India introduced an era of ornate embroidery, often displayed on saris and textiles. The significance of these decorations went beyond beauty, weaving stories and symbols of power and prestige within their stitches.
Medieval Europe: I observe that the Bayeux Tapestry is a highpoint in European embroidery, providing not just a visual recount of the Battle of Hastings but also offering insight into the medieval period’s social and cultural fabric.
Preservation of Embroidery Traditions
Guilds: Throughout history, embroidery guilds played a crucial role in the preservation and development of embroidery techniques. By safeguarding these methods, they enabled the continuation of cultural legacy through textiles.
Modern Initiatives: In my perspective, contemporary efforts to preserve embroidery traditions have become ever more important. Museums and cultural institutions across the world curate exhibitions and hold workshops to ensure these ancient arts are not lost amidst the constant change of modern times.
By examining embroidery across cultures and the initiatives for its preservation, I concretely understand its immense cultural significance and how it has been an expressive form of storytelling across ages and nations.
Troubleshooting Common Embroidery Problems
When I approach embroidery, I often encounter several common problems that can impact the final quality of my work. Knowing how to address these issues confidently and efficiently is key to maintaining smooth operation and achieving the best results.
Tension Issues: These can cause threads to be either too loose or too tight, affecting stitch quality. I always start by checking my machine’s tension settings before every project. It’s crucial to balance upper and lower thread tensions for even stitches.
- Thread Breakage: A recurrent challenge is thread shredding or breaking. I ensure the thread flows freely and consider whether my needle is the appropriate size — a small eye can cause breakage. Regularly cleaning the bobbin case is also vital.
| Common Issues | Potential Causes | Solutions |
| Bird nests | Improper thread engagement | Re-adjust the top thread, check bobbin tension |
| Thread breakage | Worn needle or tension issues | Replace the needle, clean the machine components |
| Misaligned patterns | Design not aligning properly | Double-check design placement, correct the alignment settings |
Choosing the Right Tools:
- Scissors and Yarn: Sharp scissors are essential for clean cuts, avoiding snagged threads. Quality yarn selection can also impact the final embroidery, with various materials better suited for different projects.
Quilting Adjustments:
Quilting brings additional layers that can affect embroidery. I adjust my machine’s pressure foot and tension to accommodate the extra thickness and prevent needle breakage or misaligned stitches.
Thread Color and Quills:
A properly organized thread color palette minimizes the chance for errors. As for quills, I find them less common in machine embroidery but integral for traditional hand techniques, affecting the texture and thickness of the work.
Frequently Asked Questions
In this section, I’ll address some of the common inquiries regarding embroidery. Whether you’re a novice or an expert embroiderer, the following questions cover the basics and complexities of this craft.
What are the basic steps involved in hand embroidery?
To start with hand embroidery, I first select a design and transfer it onto my choice of fabric. Then, I secure the fabric in an embroidery hoop, choose appropriate needles and thread, and begin stitching using various techniques depending on the design elements I am creating.
How do beginners start learning embroidery?
I recommend beginners begin by mastering a few basic stitches such as the running stitch, backstitch, and chain stitch. Starting with simple projects like embroidered dish towels or a monogram can provide practice and build confidence. There are many tutorials and patterns available that are designed for beginners.
What is the process for embroidering onto clothing?
When I embroider onto clothing, I stabilize the fabric with an appropriate backing and choose a suitable hoop size. I then embroider the design either by hand, carefully working the needle and thread through the fabric, or by using an embroidery machine for a faster and more uniform outcome.
Can you explain how embroidery machines operate?
Embroidery machines work by reading a digital file that dictates the design. I load the design onto the machine, secure the fabric in a hoop that attaches to the machine, and then the machine automatically sews the pattern with precision, guided by the digital instructions.
How is custom embroidery created for unique designs?
For creating custom embroidery, I digitize the design using specialized software that converts my artwork into a format readable by embroidery machines. Determining stitch types, direction, order, and colors are crucial to ensure the finished product matches my initial concept.
What techniques are used in different types of embroidery?
There are various techniques utilized in hand embroidery, including cross-stitch for pixelated designs, satin stitch for smooth coverage, and French knots for textured dots. Machine embroidery also has specific techniques, such as appliqué for adding layers of fabric and 3D puff embroidery for a raised effect. My choice of technique depends on the design and the desired final look of the project.