Introduction
In an age where video conferencing, online learning, and remote work are everyday norms, webcam security has become more important than ever. Whether you’re using a laptop for work, school, or social media, the risk of webcam hacking or unintentional exposure is real—and growing. Cybersecurity experts now widely recommend covering your webcam as a simple first step toward better digital privacy.
While commercial webcam covers are available in the market, they often come with a price tag or lack personalization. That’s why DIY webcam covers are trending—they offer a creative, budget-friendly, and functional solution for anyone looking to secure their camera without compromising on style.
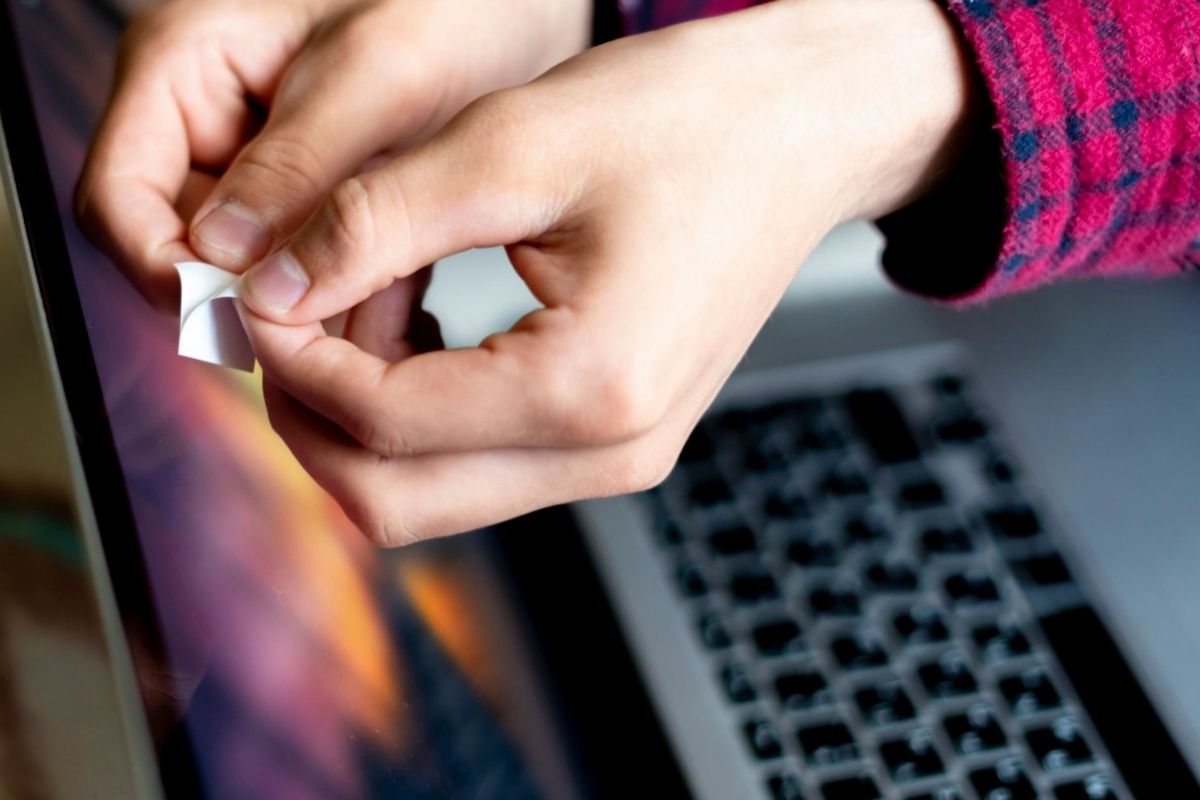
1. Origami Paper Webcam Cover – The Creative Minimalist’s Choice
Best for: Artistic individuals, students, or anyone who loves a clean, paper-based solution.
Materials:
- 8 to 10 cm square piece of origami or craft paper
- Removable adhesive or reusable poster putty
How to Make:
- Fold the paper diagonally to form a triangle.
- Fold the two outer corners toward the center to make a smaller triangle.
- Tuck and fold flaps inward to form a neat, sliding triangle.
- Stick it gently over your webcam using a small dab of putty.
Why it works:
This ultra-slim cover blends into your laptop design and doesn’t add bulk. Use patterned origami paper or match your tech aesthetic with neutral tones.
Cardboard Slider – Durable, Functional, and Smart
Best for: Long-term use, frequent travelers, or people who need a strong, reusable cover.
Materials:
- Thin cardboard (cereal box or old packaging)
- X-Acto knife
- Ruler
- Double-sided tape or glue dots
Instructions:
- Cut one piece measuring 1.5 x 2 cm (cover piece) and another 3 x 0.5 cm (track piece).
- Slice parallel lines into the track to allow movement.
- Slide the cover into the track.
- Attach the full unit above your webcam using double-sided tape.
Why it works:
Cardboard is rigid enough to hold structure while still being lightweight. You can even paint it black or silver to match your device for a sleek finish.
3. Binder Clip Webcam Cover – The Fastest, Easiest Hack
Best for: Office workers, college students, and people who need a zero-prep privacy fix.
Materials:
- Small binder clip (typically ¾ inch)
Instructions:
- Remove the metal handles from the binder clip.
- Snap the plastic body of the clip over the webcam.
- To use the camera, simply slide or rotate the clip out of the way.
Why it works:
It’s sturdy, fits most laptops, and is completely reversible—no mess, no fuss. This method is ideal for anyone who wants a privacy solution in under 30 seconds.
4. Washi Tape & Cardstock Cover – Stylish and Functional
Best for: DIYers who want both privacy and aesthetics in one design.
Materials:
- Decorative washi tape
- Cardstock or stiff paper
- Scissors
Instructions:
- Apply two strips of washi tape, one above and one below the webcam, forming a small track.
- Cut a cardstock strip that fits between the tape pieces.
- Create a pull tab by folding one edge.
- Slide the tab to open or close the cover.
Why it works:
This method is visually appealing and super easy to customize. Change tape colors or patterns whenever you like to refresh your setup.
5. Lego Webcam Cover – For Tech-Lovers and Kids-at-Heart
| Feature | Details |
|---|---|
| Material Used | Standard LEGO bricks (2×2 or flat pieces) |
| Attachment Method | Reusable adhesive putty or removable double-sided tape |
| Ease of Use | Simple to attach, remove, and reposition as needed |
| Customization | Fully customizable with different colors, shapes, and build styles |
| Aesthetic Appeal | Fun, playful, and nostalgic design that appeals to both kids and adults |
| Functionality | Physically blocks the webcam while allowing easy removal when needed |
| Best For | DIY lovers, LEGO fans, families, and creative professionals |
| Cost | Inexpensive if LEGO pieces are already available at home |
Best for: Kids, hobbyists, gamers, or tech-savvy creators.
Materials:
- One flat 2×2 Lego tile
- Reusable adhesive putty or non-damaging glue
Instructions:
- Stick the Lego tile over your webcam using putty.
- When you want to use the camera, remove or tilt the Lego.
- Customize with additional bricks for added personality.
Why it works:
Lego covers are fun, functional, and unique. Great for personalizing workstations, and they offer an opportunity for self-expression.
6. Magnetic Business Card Cover – Professional Yet Affordable
Best for: Professionals, remote teams, and corporate setups.
Materials:
- An old business card or plastic loyalty card
- Small adhesive magnets (available at craft stores)
- Optional: Matching metal disc for reverse side
Instructions:
- Cut the card to cover your webcam area.
- Attach small magnets on the back.
- Place the cover over your webcam and secure it with a reverse magnet inside the laptop lid if needed.
Why it works:
It’s a polished, low-profile solution that looks clean and intentional. Plus, it’s easy to brand or customize if you’re gifting it to team members.
Important Safety Tips for DIY Webcam Covers
Before you apply any homemade cover, keep these best practices in mind:
- Avoid strong adhesives that can leave residue or damage your screen.
- Don’t use thick materials that may prevent your laptop lid from closing.
- Watch for magnets near MacBooks or sensor-based laptops, which may cause interference.
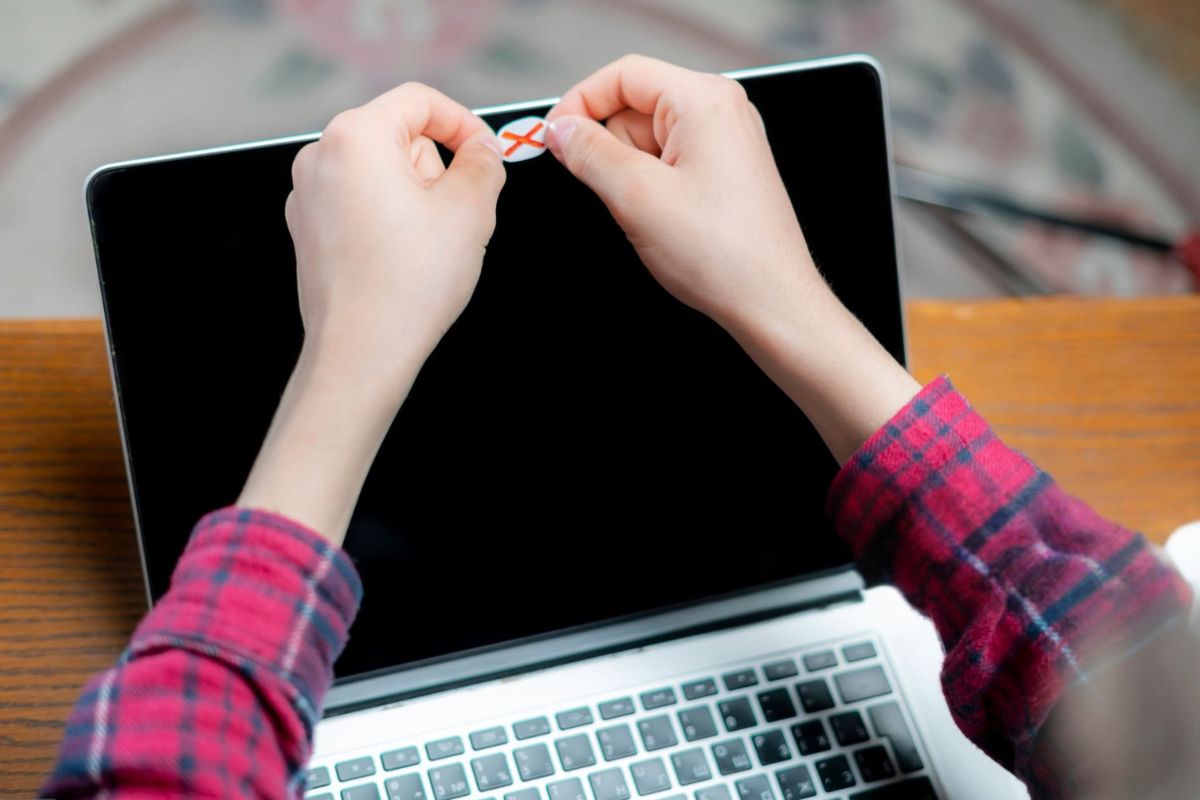
- Leave the webcam light uncovered so you can always see if it’s active.
DIY vs. Store-Bought Webcam Covers: Which Is Better?
| Feature | DIY Webcam Covers | Store-Bought Webcam Covers |
|---|---|---|
| Cost | Free or very low cost (uses household items) | Typically $5–$15 per unit (bulk discounts available) |
| Customization | Unlimited creative freedom with colors, shapes, and materials | Branding and logo options available with custom orders |
| Durability | Varies by material (paper, cardboard may wear quickly) | Consistent, long-lasting (ABS plastic, metal, etc.) |
| Installation | May require crafting tools and effort | Easy to apply, often peel-and-stick or magnetic |
| Appearance | Handmade and unique, but may look informal | Sleek, professional, and uniform appearance |
| Functionality | Basic coverage; may not slide open/close easily | Sliding or magnetic mechanisms for better usability |
| Device Compatibility | Can be adjusted to fit any device | Designed to fit most laptops, tablets, and some smartphones |
| Privacy Protection | Effective if properly placed | Engineered for reliable coverage and reusability |
| Best For | Personal use, creative projects, kids’ activities | Corporate branding, professional gifting, tech-savvy users |
When it comes to protecting your privacy, both DIY webcam covers and store-bought webcam covers have their unique advantages. The best choice depends on your budget, needs, and how often you’ll use the cover. Let’s break down the pros and cons of each to help you make an informed decision.
1. Cost & Accessibility
- DIY Covers:
Most DIY webcam covers can be made with materials you already have at home—paper, tape, cardboard, or even a binder clip. This makes them virtually free and highly accessible. - Store-Bought Covers:
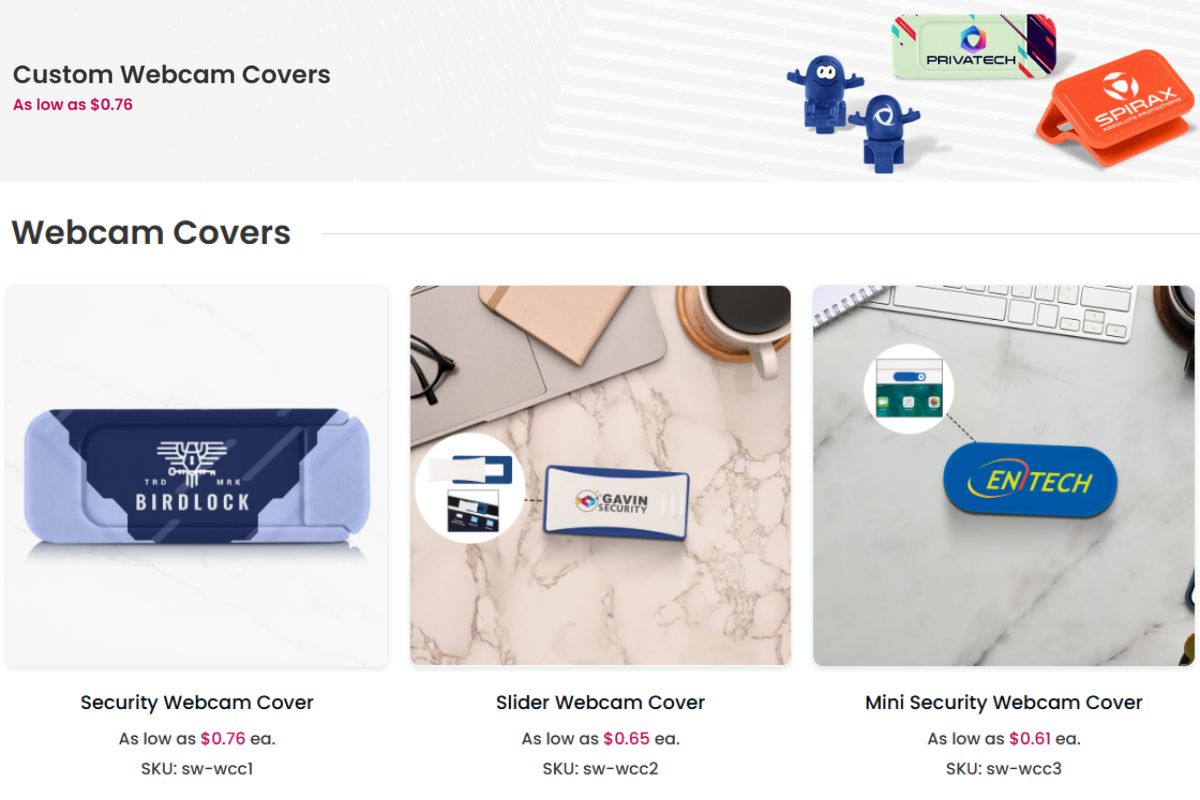
Prices typically range from $5 to $15 depending on features (magnetic, ultra-slim, branded, etc.). While not expensive, they’re still a paid solution and may require online ordering and delivery time.
Verdict: DIY wins for cost and convenience.
2. Customization & Creativity
- DIY Covers:
You can personalize them with different colors, patterns, and materials. Want a floral design, a superhero theme, or something minimal and modern? It’s all up to your creativity. - Store-Bought Covers:
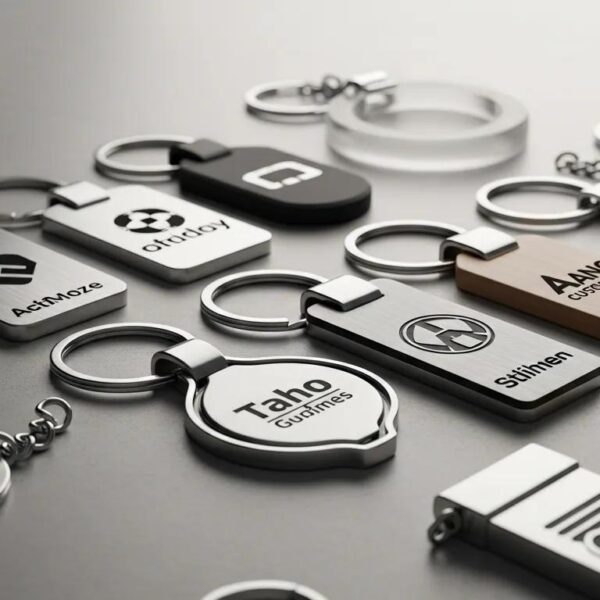
Limited to the designs offered by the brand. However, companies like Swagify and Flashbay allow for custom logo printing, ideal for business giveaways or corporate branding.
Verdict: DIY is great for personal flair. Store-bought wins for professional branding.
3. Durability & Longevity
- DIY Covers:
While many DIY designs work well, their durability depends on the materials used. Paper and cardboard can wear out quickly, especially with repeated sliding or taping. - Store-Bought Covers:
Designed for long-term use, most commercial covers are made from ABS plastic, metal, or recyclable eco-friendly polymers that can withstand daily wear and tear.
Verdict: Store-bought offers higher durability and consistent performance.
4. Fit, Finish & Aesthetics
- DIY Covers:
They might look charming or quirky, but they can also appear bulky or homemade if not done precisely. Some might interfere with the laptop’s lid closing or camera light. - Store-Bought Covers:
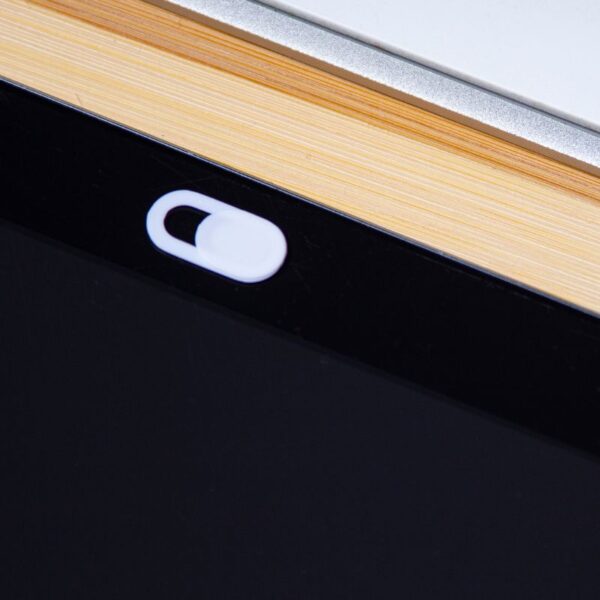
Designed to be ultra-slim, often under 1.25mm in thickness. These covers maintain the sleek look of your device and are barely noticeable when not in use.
Verdict: Store-bought covers win for professional appearance and sleek design.
5. Ease of Installation & Functionality
- DIY Covers:
Easy to create and install, but they may lack a sliding mechanism or require repositioning each time. Some may fall off or leave adhesive residue. - Store-Bought Covers:
Most feature smooth sliding mechanisms or magnetic covers for effortless use. Installation takes seconds, and they stay in place securely.
Verdict: Store-bought offers better usability, especially for daily webcam users.
Final Recommendations: Which DIY Webcam Cover Should You Try?
- Quick fix? Go with the binder clip—it’s fast, removable, and reliable.
- Want style and personality? Choose the washi tape or origami design.
- Need durability and polish? Opt for the cardboard slider or magnetic card approach.
- Have kids or a playful side? Try the Lego method and make it a fun project.
No matter your preference, making your own webcam cover is an easy, empowering way to protect your privacy and add personal flair to your tech gear.